> For the complete documentation index, see [llms.txt](https://magecomp.gitbook.io/shopify/llms.txt). Markdown versions of documentation pages are available by appending `.md` to page URLs; this page is available as [Markdown](https://magecomp.gitbook.io/shopify/apps/rewardo-loyaly-program/referral-programme.md).
# Referral Programme
The **Referral Program** allows you to reward both the **referrer** (existing customer) and the **referee** (new customer) when a successful referral is made. By offering rewards to both parties, you can encourage existing customers to invite friends while attracting new customers to your store.
#### Step #1 Enable the Referral Program
Use the **Enable/Disable** toggle to activate or deactivate the referral program.
#### Step #2 Configure Referrer Rewards
Define the rewards given to the customer who shares the referral link.
You can configure:
* **Signup Reward Type** – Fixed Amount or Percentage.
* **Signup Reward** – Reward earned when the referred customer signs up.
* **First Order Reward Type** – Fixed Amount or Percentage.
* **First Order Reward** – Reward earned when the referred customer places their first order.
**Example:** Offer a **20% discount** when a friend signs up and an additional **$100 reward** after the friend completes their first purchase.
#### Step #3 Configure Referee Rewards
Define the reward given to the new customer who joins using a referral link.
You can configure:
* **Signup Reward Type** – Fixed Amount or Percentage.
* **Signup Reward** – Reward granted immediately after the new customer creates an account.
**Example:** Offer a **$100 discount** to every new customer who signs up through a referral link.
#### How the Referral Program Works
1. An existing customer shares their unique referral link.
2. A new customer opens the link and signs up.
3. The **referee** receives the configured signup reward.
4. The **referrer** receives the signup reward (if enabled).
5. When the referee places their **first order**, the referrer receives the configured first-order reward.
**Example:**
* John shares his referral link with Emma.
* Emma signs up and receives a **$100 discount**.
* John earns a **20% discount** for the successful signup.
* After Emma places her first order, John receives an additional **$100 reward**.
This reward structure motivates both customers to participate, helping you grow your customer base and increase repeat purchases.
## Referral Widget Customization
The **Referral Customization** section lets you personalize the customer-facing referral experience to match your store's branding.
#### Referral Page
The **Referral Page** is a dedicated page where logged-in customers can view their referral rewards, generate their unique referral link, copy it, and share it with friends via email, social media, or messaging apps.
**Example:** A customer visits the Referral Page, copies their referral link, and shares it with friends to earn rewards whenever someone signs up or places their first order.
#### Referral Pop-up
The **Referral Pop-up** is displayed when a customer opens a referral link. It introduces the referral offer, explains the available rewards, and encourages the visitor to sign up using the referral.
**Example:** A customer clicks a friend's referral link and sees a popup stating, *"Sign up today and get $100 off your first purchase."*
You can customize the text, colors, fonts, buttons, and layout of both the Referral Page and Referral Pop-up to provide a consistent brand experience.
## Loyalty Widget Customization
The **Loyalty Customization** section allows you to customize every loyalty widget shown to customers across your store.
### Widget
Customize the floating loyalty widget that gives customers quick access to their points, rewards, referral program, and loyalty activities from any page.
The **Loyalty Widget Customization** section lets you personalize the loyalty widget to match your store's branding. You can customize its theme, colors, layout, fonts, icons, and content, with changes reflected instantly in the live preview.
#### Step #1 Choose a Theme
Select a predefined theme or create your own using custom colors and backgrounds.
#### Step #2 Customize Widget Appearance
Configure:
* Widget Background (Image, Solid Color, or Gradient)
* Background Colors
* Title & Subtitle Color
* Balance Card Icons
#### Step #3 Configure Layout
Choose the widget's:
* Type (Compact or Full Height)
* Position (Bottom Left, Bottom Right, or Center)
* Launcher Button Type (Icon or Icon + Label)
* Launcher Icon
#### Step #4 Customize Content
Edit the text displayed in the widget, including:
* Welcome Title & Subtitle (supports {{store\_name}}
* Login/Signup Card
* Rewards Card
* Referral Program Card
* Copy Button Label
* Launcher Button Label
Use {{referralreward}} to automatically display referral rewards.
#### Step #5 Customize Font
Choose your store's default font or apply a custom font to the widget.
#### Step #6 Preview & Save
Review the live preview and click **Save** to apply your changes.
{% hint style="info" %}
**Note:** The same customization options are available for the **Loyalty Page**, **Cart Page Redeem Card**, **Sign-up Pop-up**, **First Order Pop-up**, **Newsletter Pop-up**, **Referral Page**, and **Referral Pop-up** to maintain consistent branding across your loyalty program.
{% endhint %}
### Loyalty Page Customization
The **Loyalty Page Customization** section allows you to customize the layout and visibility of different sections on your loyalty page. You can show or hide sections, rearrange their order using drag-and-drop, and preview the changes in real time.
#### Step #1: Open the Loyalty Page Editor
Navigate to **Customization** → **Loyalty Page** to open the page editor.
#### Step #2: Manage Page Sections
You can customize the following sections:
* Hero Section
* How It Works Section
* Rewards Section
* Subscribe Newsletter Section
* Referral Section
* Balance Section
* Redeem Rewards Section
#### Step #3: Reorder or Show/Hide Sections
* **Drag and drop** sections to change their display order.
* Click the **Eye** icon to show or hide a section without deleting it.
#### Step #4: Preview the Layout
Use the live preview to see how the loyalty page will appear on desktop or mobile before publishing.
#### Step #5: Save Changes
Once you're satisfied with the layout, click **Save** to apply your changes.
{% hint style="info" %}
**Note:** You can rearrange or hide any section at any time to create a loyalty page that best suits your store and customer experience.
{% endhint %}
### Cart Page Redeem Card
The **Cart Page Redeem Card Customization** section allows you to personalize the reward redemption card displayed on the Shopify cart page. You can customize its theme, colors, fonts, styling, and text to match your store's branding.
#### Step #1 Choose a Theme
Select one of the available predefined themes:
* Just White
* White Truffle
* Black Truffle
* Cyberpunk
* Funky
#### Step #2 Customize Theme Colors
Personalize the card's appearance by configuring:
* Background Color
* Border Color
* Text Color
* Icon Color
* Card Inner Box Color
* Link Color
* Description Color
#### Step #3 Customize Style
Adjust the overall design of the card by setting:
* Corner Radius
* Border Weight
#### Step #4 Customize Font
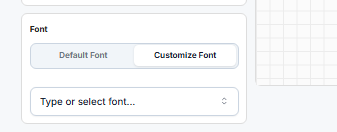
Choose to use your store's **Default Font** or apply a **Custom Font**.
#### Step #5 Edit Card Content
Customize the text displayed on the redeem card, including:
* **Card Title**
* **Generate Button Text**
* **Discount Input Helper Text**
**Example:** Change the title to **"Available Rewards"**, the button text to **"Redeem Now"**, and the helper text to **"Enter the amount you want to redeem."**
#### Step #6 Preview & Save
Review your changes in the live preview and click **Save** to apply them.
{% hint style="info" %}
**Note:** The customized redeem card will appear on your cart page, allowing customers to redeem their available loyalty rewards before checkout.
{% endhint %}
### Sign-up Pop-up Customization
The **Sign-up Pop-up Customization** section allows you to personalize the popup displayed to visitors, encouraging them to join your loyalty program and create an account. You can customize its theme, colors, layout, behavior, illustration, fonts, and text to match your store's branding.
#### Step #1 Choose a Theme
Select one of the available themes:
* Just White
* Black Traffic
* Cyberpunk
* Funky
#### Step #2 Customize the Pop-up Appearance
Configure the popup's colors to match your brand:
* Background Color
* Title Color
* Subtitle Color
* Button Background
* Button Border
* Button Text Color
* Close Button Color
* Close Button Icon Color
#### Step #3 Customize Style & Behavior
Adjust the popup's appearance and display settings:
* Button Corner Radius
* Button Border Weight
* Popup Corner Radius
* Popup Direction (Horizontal or Vertical)
* Popup Behavior (Automatic or Launcher Button)
* Auto-open Delay
#### Step #4 Choose an Illustration
Select one of the available illustrations or upload a custom illustration to make the popup more engaging.
#### Step #5 Customize Font & Content
Choose your store's **Default Font** or a **Custom Font**, then edit:
* Pop-up Title
* Subtitle *(supports {{rewardAmount}} to display the configured reward automatically)*
* Join Now Button Text
**Example:** Set the subtitle to **"Sign up today and unlock {{rewardAmount}} cashback on your account."**
#### Step #6 Preview & Save
Review the live preview and click **Save** to apply your changes.
{% hint style="info" %}
**Note:** The same customization options are available for the **First Order Pop-up**, **Newsletter Pop-up**, and **Referral Pop-up**, allowing you to maintain a consistent design across all promotional pop-ups.
{% endhint %}
### First Order Pop-up Customization
The **First Order Pop-up Customization** section allows you to personalize the pop-up displayed to encourage customers to place their first order and earn a reward. You can customize its theme, colors, input fields, layout, behavior, and content to match your store's branding.
#### Step #1 Choose a Theme
Select one of the available themes:
* Just White
* Blush Traffic
* Cyberpunk
* Funky
#### Step #2 Customize the Pop-up Appearance
Configure the pop-up colors, including:
* Background
* Title
* Subtitle
* Input Label
* Input Border
* Input Background
* Button Background
* Button Border
* Button Text
* Close Button
* Close Button Icon
#### Step #3 Customize Style & Behavior
Adjust the popup's appearance and display settings:
* Button Corner Radius
* Button Border Weight
* Input Corner Radius
* Input Border Weight
* Popup Corner Radius
* Popup Direction (Horizontal or Vertical)
* Popup Behavior (Automatic or Launcher Button)
* Auto-open Delay
#### Step #4 Choose an Illustration
Select one of the available illustrations or upload a custom illustration to display in the popup. This helps make the popup more engaging and aligned with your brand.
#### Step #5 Customize Font
Choose whether to use your store's **Default Font** or apply a **Custom Font**. By default, the popup inherits the font from your Shopify theme to maintain a consistent look across your store.
Then continue with:
#### Step #6 Customize Content
Edit the popup text, including:
* Title
* Subtitle *(supports {{rewardAmount}} to display the configured reward automatically)*
* Email Input Label
* Phone Number Input Label
* Claim Reward Button Text
#### Step #7 Preview & Save
Review the live preview and click **Save** to apply your changes.
{% hint style="info" %}
**Note:** The same customization options are available for the **Sign-up Pop-up**, **Newsletter Pop-up**, and **Referral Pop-up**, allowing you to maintain a consistent look and feel across all promotional popups.
{% endhint %}
### Newsletter Pop-up Customization
The **Newsletter Pop-up Customization** section allows you to personalize the popup displayed to encourage customers to subscribe to your newsletter in exchange for loyalty rewards. You can customize its theme, colors, layout, behavior, illustration, fonts, and content to match your store's branding.
#### Step #1 Choose a Theme
Select one of the available themes:
* Just White
* Black Traffic
* Cyberpunk
* Funky
#### Step #2 Customize the Pop-up Appearance
Configure the popup colors, including:
* Background
* Title
* Subtitle
* Input Label
* Input Border
* Input Background
* Button Background
* Button Border
* Button Text
* Close Button
* Close Button Icon
#### Step #3 Customize Style & Behavior
Adjust the popup's appearance and display settings:
* Button Corner Radius
* Button Border Weight
* Input Corner Radius
* Input Border Weight
* Popup Corner Radius
* Popup Direction (Horizontal or Vertical)
* Popup Position (Left, Middle, or Right)
* Popup Behavior (Automatic, Launcher Button, or Both)
* Auto-open Delay
#### Step #4 Choose an Illustration
Select one of the available illustrations or upload a custom illustration to make the popup more engaging and visually appealing.
#### Step #5 Customize Font
Choose whether to use your store's **Default Font** or apply a **Custom Font**. By default, the popup uses your Shopify theme's font for a consistent look.
#### Step #6 Customize Content
Edit the text displayed in the popup, including:
* Title
* Subtitle
* Email Input Label
* Subscribe Button Text
* Launcher Button Text
**Example:** Set the title to **"Subscribe to our Newsletter"** and the launcher button text to **"Get Reward"** to encourage visitors to subscribe.
#### Step #7 Preview & Save
Review the live preview and click **Save** to apply your changes.
{% hint style="info" %}
**Note:** Your customized newsletter pop-up will appear according to the selected display behavior and encourage visitors to subscribe before earning loyalty rewards.
{% endhint %}
### Reward Notify Banner
The **Reward Notify Banner** allows the admin to customize a notification banner that informs customers about rewards they have earned and can claim.
#### Steps to configure the Reward Notify Banner
**Step 1: Open Display Customization**
1. Open **Rewardo Loyalty Program** from the Shopify Admin.
2. Go to **Display Customization**.
3. Select **Reward Notify Banner**.
**Step 2: Enable the Banner**
At the top-right of the page, turn on the **Enable** toggle.
When enabled, the Reward Notify Banner can be displayed on the storefront.
> **Important:** The screenshot shows a message stating that the **Place Order loyalty program must be activated first**. Activate the Place Order loyalty program before expecting this banner to appear on the store.
**Step 3: Customize the Theme and Style**
Click **Theme and style** to customize the appearance of the notification banner.
The available settings shown in the screenshot include:
* **Default Themes**
* Just white
* White Truffle
* Black Truffle
* Cyberpunk
* Funky
Select a predefined theme if you want to quickly apply a ready-made design.
**Step 4: Customize Colors**
Under **Theme**, you can customize the banner's:
* **Background color**
* **Border color**
* **Title color**
* **Subtitle color**
* **Icon color**
* **Icon icon/background-related setting shown in the interface**
This allows the banner to match the store's branding.
**Step 5: Choose the Banner Icon**
Under **Banner Icon**, select an icon that will appear with the reward notification.
The screenshot provides multiple icon options, along with an upload option.
Choose the icon that best matches the store's design.
**Step 6: Adjust the Banner Style**
Under **Style**, configure:
* **Corner radius** – controls how rounded the banner corners are.
* **Border weight** – controls the thickness of the banner border.
Adjust these values to achieve the desired appearance.
**Step 7: Select the Banner Position**
Under **Position**, choose where the notification should appear:
* **Left**
* **Right**
The interface indicates that the banner appears in a widget corner.
**Step 8: Select the Font**
Under **Font**, choose between:
* **Default Font** – uses the default font from the Shopify theme.
* **Customize Font** – allows the admin to customize the font.
**Step 9: Configure Pop-up Behavior**
Under **Pop-up behavior**, configure the delay before the popup automatically opens.
The screenshot shows:
* **Automatic Pop Delay**
* A value in **seconds**
For example, if the delay is set to `5 seconds`, the popup will automatically open after the specified delay.
**Step 10: Customize the Banner Content**
Click **Content and translations**.
Here you can customize:
* **Title**
* **Subtitle**
The screenshot uses:
**Title:**\
`Product added to cart`
**Subtitle:**\
`Checkout now and get {{rewardAmount}}`
The `{{rewardAmount}}` value is dynamic and allows the reward amount to be displayed automatically.
**Step 11: Check the Preview**
Use the **Reward notify banner Preview** section to see how the notification will appear.
The preview also provides display options for checking the banner in different storefront views.
Review the banner before saving.
**Step 12: Save the Changes**
After completing the customization, click **Save**.
If you do not want to keep the changes, click **Discard**.
## Product Page Banner
The **Product Page Banner** allows the admin to show customers the reward they can earn by purchasing a product. This helps customers understand the potential reward before completing their purchase.
Rewardo supports purchase rewards as part of its loyalty functionality.
#### Steps to configure the Product Page Banner
**Step 1: Open Display Customization**
1. Open **Rewardo Loyalty Program** from Shopify Admin.
2. Go to **Display Customization**.
3. Select **Product Page Banner**.
**Step 2: Enable the Banner**
Turn on the **Enable** toggle at the top-right.
Once enabled, the Product Page Banner can be displayed on product pages.
The screenshot also shows the same important activation message:
> **First activate the Place Order loyalty program, and then this banner will show on your store.**
Therefore, make sure the **Place Order loyalty program is active** before testing the banner on the storefront.
**Step 3: Customize the Theme and Style**
Click **Theme and style**.
You can select one of the predefined themes:
* Just white
* White Truffle
* Black Truffle
* Cyberpunk
* Funky
Alternatively, customize the appearance manually.
**Step 4: Customize the Banner Colors**
The screenshot provides options for:
* **Background color**
* **Border color**
* **Text color**
* **Icon color**
* **Icon container**
Use these settings to match the banner with your Shopify store's branding.
**Step 5: Configure the Banner Style**
Under **Style**, configure:
* **Corner radius** – controls the roundness of the banner corners.
* **Border weight** – controls the thickness of the banner border.
**Step 6: Choose an Icon**
Under **Choose Icon**, select the icon that should appear on the Product Page Banner.
Several predefined icons are available, so select the one that best fits the store's design.
**Step 7: Configure the Font**
Under **Font**, choose:
* **Default Font** – uses the font from the Shopify theme.
* **Customize Font** – allows you to customize the banner font.
**Step 8: Customize the Product Banner Content**
Go to **Content and translations**.
The screenshot provides two fields under **Banner Content**:
#### Title
Enter the message that customers should see regarding the reward.
The screenshot shows a dynamic example similar to:
`Get {{reward}} for this purchase for the orders above {{minimumOrderAmount}}`
The available dynamic values shown in the interface can be used so that the banner automatically displays the applicable reward/order information.
#### Description
Enter a short supporting message.
The screenshot example is:
`Cashback is redeemable in the checkout page`
Use this field to explain how or where the customer can use the reward.
**Step 9: Check the Preview**
The **Product page banner preview** shows how the banner will appear to customers.
The preview example displays a message such as:
> `Get $10 for this purchase for the orders above $0`
with supporting text explaining that the cashback is redeemable at checkout.
The screenshot also indicates that the preview uses an example order value, so the displayed amount in the preview should be treated as an example rather than a customer's actual reward.
**Step 10: Save the Changes**
After reviewing the banner:
1. Check the title and description.
2. Check the theme and colors.
3. Check the icon and font.
4. Review the preview.
5. Click **Save**.
Click **Discard** if you want to cancel the changes.
#### Key difference between the two banners
| Feature | Reward Notify Banner | Product Page Banner |
| ------------------------------ | ------------------------------------------------------------ | ----------------------------------------------------------------- |
| Main purpose | Notifies customers about rewards they have earned/can claim | Shows customers what reward they can earn from a product purchase |
| Main location | Storefront notification/widget | Product page |
| Content | Reward notification title + subtitle | Reward message + description |
| Customization | Theme, colors, icon, position, font, popup behavior, content | Theme, colors, icon, font, content |
| Dependency shown in screenshot | Place Order loyalty program must be activated | Place Order loyalty program must be activated |
So, in simple terms: **Reward Notify Banner communicates the reward notification, while Product Page Banner promotes the reward customers can earn before they purchase.** Both are configured from **Display Customization** in Rewardo.